This is going to be a huge post. :) I love making historical clothes and Victorian period is my absolute favorite. I´ve made a couple of Victorian dresses in the past, mainly using my own pattern and design. I got this marvelous book called Making Victorian Costumes for Women by Heather Audin. Book provides a lot of information about Victorian wardrobe and has seven replica projects from each decade of Victorian period (1870s has two projects). I´ll make all of them ;)

Second book I used as a reference for dropped shoulder pattern is Creating Historical Clothes by Elisabeth Friendship. This is an excellent book as well, mainly ment for professional costume designers as pattern drafting is very labored. All designs start with the basic bodice and then step by step changes are added. So if you want a particular design, you have to draft about 3 different bodices to get it.

Pattern was supposed to be scaled and then adjusted. I firstly drew the pattern in small version and tried to count the measurements and adjust them as well. After several hours I began to be suspicious that something is not right. Shoulder seam on fronts was way too long for the one in back, same front side seam was longer than back side seam. I don´t know how this would have worked just scaled. I gave up scaling and drew my own pattern taking design features into account.

Here are my own pattern pieces for bodice: back, side back, front, side front. I changed the side front a bit after this picture has been taken.

Sleeve and bodice shawl front.

Geisha helping me to pick right trims for this project. :)

Heather lace didn´t make the cut.

What is interesting about Victorian clothes is that the lining is treated as second layer of outer fabric and not as a finished separate layer that would have been sewn into finished outer layer as done these days. All lining pieces are basted to outer pieces. I sewed all darts before doing this to get a neater finish.

Fronts and side fronts stitched together. I should mention that I am making this dress (and others to come) for myself, for fun and to try new techniques. Since this dress isn´t going to be a museum display and I plan to make many more, I am using sewing machines where convenient (for faster sewing) and hand sewing where it is beneficial. 1840s dress would have been sewn entirely by hand. This bodice is fastened with hooks at back. Since I don´t have a lady´s maid to hook all those hooks for me, I´m using invisible zip as closure. It will make dressing and undressing much faster and difference won´t be seen.

Pleating the bodice shawl front on the mannequin. This wouldn´t be possible to do without the mannequin padded to required shape. The pleats marked on the pattern didn´t work so I did the pleating without it carefully measuring every centimeter, every gap and pinning to place.

Detail of pleated shoulder.

Bodice shawl front pinned to front ...

... and basted in place.

Pleats sewn in place by hand using hem stitch from bust down.

Side edge of the bodice shawl front stitched in place by hand using cat stitch. This is super clever stitch I found in the book Authentic Victorian Sewing Techniques, edited by Kristina Harris. It is still used today in couture sewing. Some may know it as catch stitch.

Pattern was suggesting boning for bodice. I thought it would be more practical if I´d use horsehair braid instead. It will be softer and washable. Here it´s being attached using overcasting method.

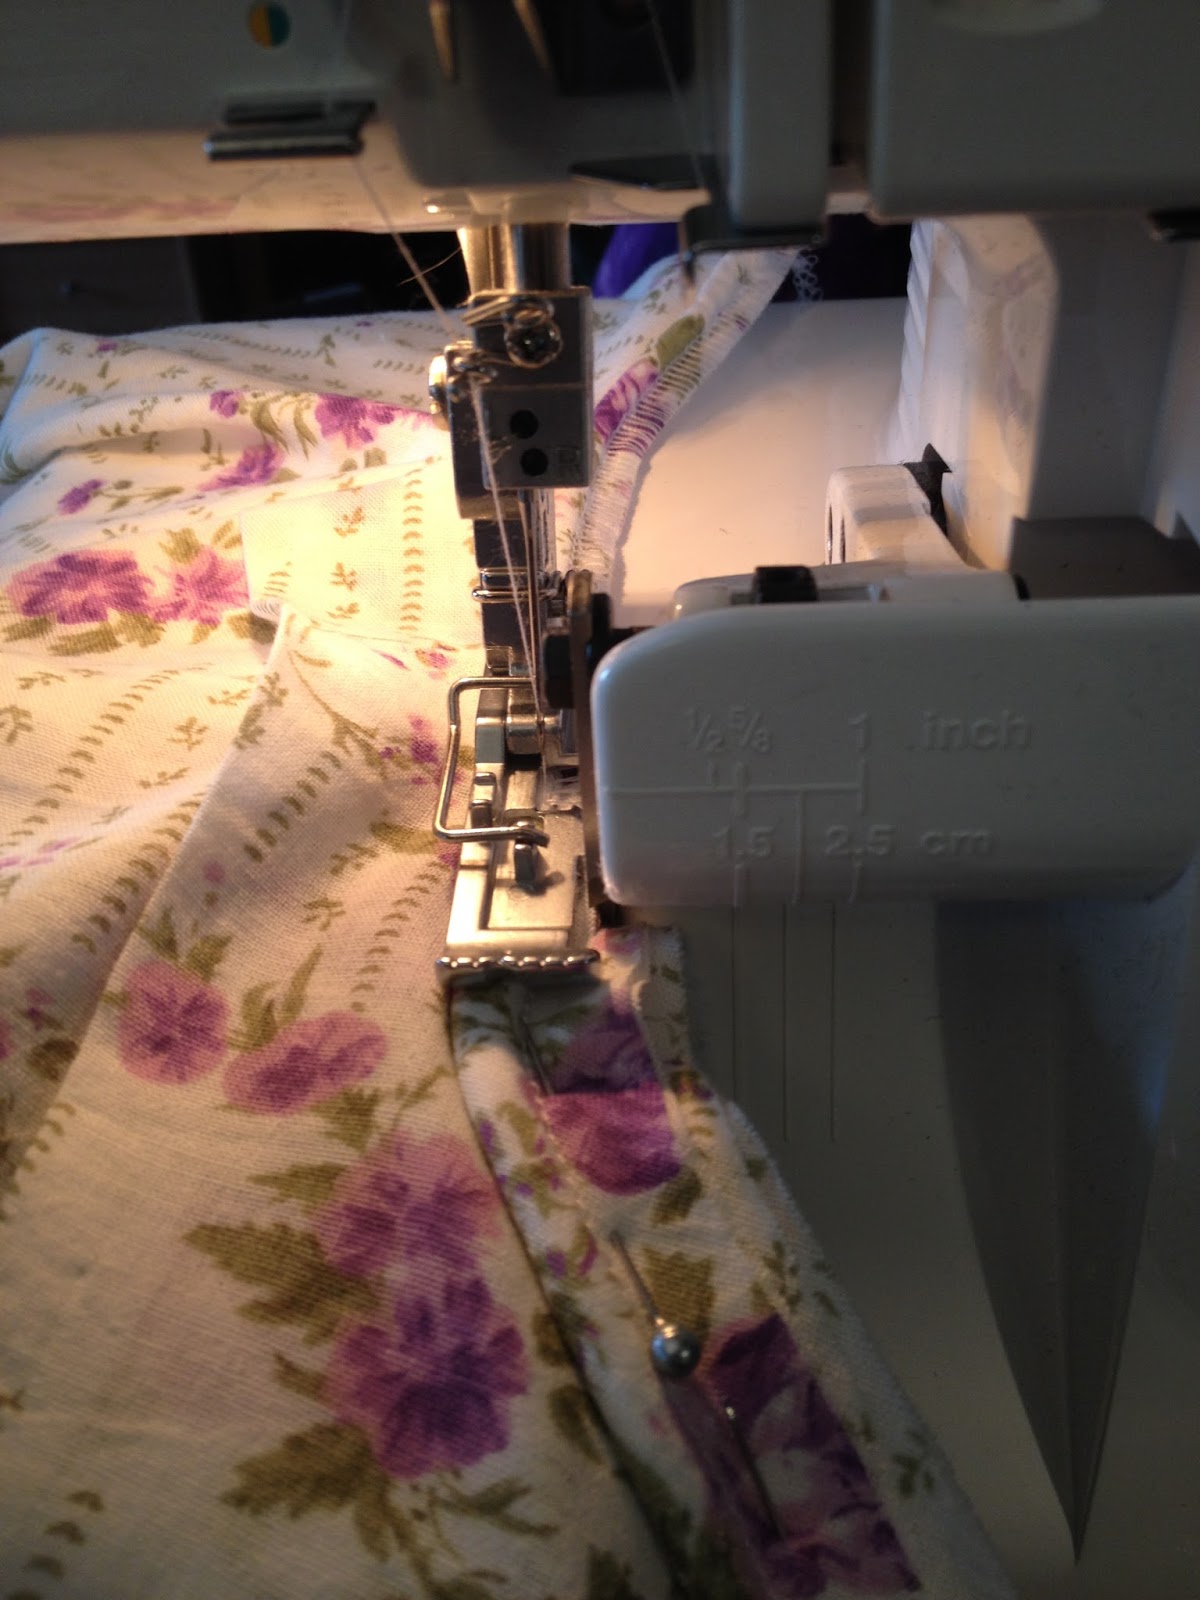
Corded piping was used to finish collar and bottom of the bodice. I used piping foot on my Bebe overlocker. It has a groove underneath which accommodates the corded piping. Then I turned the overlocked edge on the wrong side and cat stitched it to place.

Bottom edge of the bodice prepared for Bebe.

I was worried about this peak, how it will work. It went fine, I didn´t turn at the peak, I sewed two seams instead.

Sleeves are embellished with hand sewn faux pleats and lace trim.


Finished dress photographed with crinoline underneath. 1840s dress would have been worn with large amount of petticoats instead of the crinoline but I just wanted to see how it would look with it.
I´m quite pleased with the outcome. :)


Side and back view of the dress with crinoline underneath.

4,65 meters wide skirt has been gathered and sewn to bodice by hand using cartridge pleat method.


Here is the dress photographed with chemise and two petticoats underneath and with separate sleeves called engageantes that would have been worn with it. I will have to photograph this dress again when I have finished all the appropriate undergarments.

Engageantes made form embroidered cotton fabric. Hooks and eyes are used as closures at wrist and elastic is holding the sleeve on top of forearm.
No comments:
Post a Comment